[youtube][http://www.youtube.com/watch?v=vX6BVEVYhwI&feature=share&list=PLzio60ZRzGwaeVf2SNIxYydbsrQzOY7zp&index=8/youtube]
Video Sections:
00:38 - Module 1.0 - Overview 03:12 - Module 2.0 - Hardware: A Remote Controlled Robot 16:32 - Module 3.0 - Lane Following 25:14 - Module 3.1 - Shape Detection 30:37 - Module 3.2 - Map Processing 45:13 - Module 3.3 - Extra Hints 57:00 - Summary
TOOLS:
Soldering Iron Laptop USB Webcam / Smartphone camera Visual Studio / MATLAB AVR programming software / Arduino IDE MATERIALS:
2 Wheels 1 Castor Wheel Metal Chassis 2 DC motors 1 Development Board 1 Microcontroller (Atmega 16/32/328) 1 Programmer (ISP/Arduino) Motor Driver (L293D) Relimates Bluetooth Communication module/ USB-UART/ Xbee PROBLEM STATEMENT:
Create a vision-guided robot which can use onboard video feed to navigate an environment based on an overhead image as a map.
In this DIY, for the purpose of an easy introduction, we will discuss the approach to the event in a modular manner. We will first learn how to make a mobile robot which is capable of moving according to instructions received from the laptop. Then we will discuss how to navigate the arena of Geo-Aware using an onboard camera, via two modules, lane following and shape detection. Finally, we will see how the map that will be given at the start can be processed to obtain information about the path to be taken, which can then be utilized during the onboard run. We will also discuss some ideas to tackle some harder aspects of the event.
The above things put together, will help us make a robot that should be able, if programmed properly, to solve the problem statement of Geo-Aware. PART 1 – A REMOTE CONTROLLED ROBOT
LOCOMOTION
The robot can be made to move by using a differential drive as the base. With independent motors for the left and right sides of the base, differential drives allow the robot to move in all directions and turn as well. How the motors will rotate will be determined by the voltage supplied to the motor by the motor driver circuit, which in turn will depend on the instructions sent to the motor driver by the microcontrollers. For more details on differential drives, please check here.

Fig: The schematics of a differential drive

Fig: An actual differential drive
MICROCONTROLLER
Conceived to be the brain of the robot, the microcontroller is the device that allows us to control the robot and make it autonomous. By pre-programming it, we can make it give different outputs based on different inputs and instructions received, and thereby the robot acts accordingly. For a more elaborate understanding of the working of an AVR microcontroller, please visit here. Essentially you only need to program the microcontroller on your robot, to move in a particular direction, based on the character received by it from the laptop.

Fig: The development board for the microcontroller from Robokits
For the purpose of a demonstration, we will show the sample code for WSAD robot, which basically means a robot that can move forward and back, and turn left and right, when the keys w, s, a and d respectively, are pressed – the basic movements of a differential drive.
The code to be burnt on your microcontroller can be found here.
The instruction from the microcontroller is sent to the motor driver circuit (assumed to be connected to Port B here), which then sends it to the motors. Please note that you must test which combination of voltages makes the motor rotate in which direction – the bit sequences you send based on the characters received will depend on that.

Fig: A schematic diagram of a motor driver circuit

Fig: An actual motor driver circuit with an L293D SERIAL COMMUNICATION
Once we have linked our computer to the microcontroller via the connections we discussed earlier, we need to be able to send instructions to it through our code. In our project that we shall use for our Image Processing application in robotics, we have to include files and use certain functions for starting the serial communication device, and then sending data to the microcontroller through the device. We use files that have already been made for this purpose. These are:
- tserial.h – A header file for starting the serial device
- tserial.cpp – The C++ program that actually initializes the device
- bot_control.h – The file which contains the definitions of the functions which shall be used for the purpose of serial communication [send_data(), startDevice(), stopDevice() etc]
These files are available for download from our website. After being downloaded, they need to be included in the Visual Studio project you are using. What you need to do is gather all these three files in a directory and add the path of that directory in Project-> Properties->C/C++->General->Additional Include Directories, and apply the changes to the settings. Also, Project-> Properties->Configuration Properties->General->Character set should be changed to Not Set.
As you can see, all of the above will help you to create a robot that is capable of moving in response to commands that you send to it from the laptop. In Seeker, of course, these commands will have to be sent autonomously from your program. What commands will be sent, will depend on the image processing done by your program on the video feed received. We will discuss how to do that now. N.B – All of the above which we accomplished with an AVR microcontroller can also be done through Arduino, another very popular framework for microcontroller programming. Please look here for tutorials on general usage and communication using Arduino.
The program here is a standard one which shows how to send characters through the serial communication device, via the code in your Visual Studio project.
PART 2 – COMPUTER VISION Before proceeding with this module, we would request you to go through the set of general tutorials for computer vision, for both MATLAB and OpenCV, also found on our website. It is quite extensive, and we will assume that a working knowledge, as put forward there, is in the grasp of the reader of this tutorial.
The major sub-tasks that the computer vision will have to take care of are: TRAVERSING THE CORRIDOR
The pictures and the 3D model of the simulated indoor arena give a good idea of what kind of corridors the robot will be traversing.
The first step would be to reduce the image of the corridor to the essential features. By applying Canny Edge detection and then excluding a certain upper portion of the image, the following transformations can be obtained: (The sample coloured image is an estimated view of the corridor in front of the robot, from the 3D model of the arena)


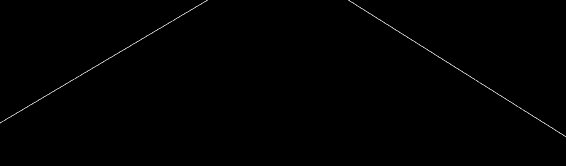
Fig: The actual passage; the first transformation to edges; the second transformation after excluding the upper half of the image
As you can see, the transformations on the image received have made the video feed of the image considerably easier to analyse. Now the corridor essentially consists of two sloping lines on either side of the robot. We can use this information effectively to determine how the robot should move along the corridor.
Using the angles of the lines
To successfully implement this, you will need to be comfortable with the Hough Transform for lines, which will need to be implemented on the image. You may refer to our tutorial or to any other on the website for how to do this.
Applying the polar line transform will give you the major lines in the image and their angles, with algebraic sign. Visualising it very simply, one sees that if the sum of the angles of the two major lines is nearly zero, then the robot is placed between the two lines, and in the correct direction. At this point of time, it can move forward. Otherwise the robot must turn accordingly, such that the sum of the slopes becomes zero. A combination of these two techniques should allow the robot to make its way along the corridor while following it.
Given below is a code snippet which implements this part of the problem statement, in the manner described.
Generating a middle path
Another method to understand and follow the lane would also require the use of this type of reduction. Thereafter, it would require the generation of two lines that are parallel to each other and perpendicular (almost) to the direction of the two lines. The transformation is shown here:

The above transformation can be done simply by taking two pairs of nearly equidistant points on the two lines, and computing their mid-points, and then comparing the relative positions of the mid-points. If the two mid-points are almost along the same vertical line, then the robot is in the correct orientation and should move forward. Otherwise, it should turn accordingly.
The above two methods can be used to allow the robot to follow a corridor. Now, we go to the next sub-problem to be solved by image processing – that of recognising the signs and symbols. SYMBOL RECOGNITION
The known symbols to be recognized in this event are circles, squares and triangles (there is also a hexagon for round 3 but we won’t discuss that right now). By a process of both elimination and image analysis, we can easily recognize which of them is at the end of a particular corridor, as the robot approaches the symbol.
It is assumed that the image frame taken from the video feed will be mostly a black background, and the relevant symbol occupying the majority of the frame, coloured blue, green or red. By colour detection, we can find out what that colour is, thereby cutting down the number of possibilities significantly. Of course, our program should have methods to recognise all the symbols, and which are called accordingly based on the colour. (If the participant is using a makeshift overhead camera which the robot is carrying, then the same principle applies, except that the background will be white instead of black)
Contour Matching
The OpenCV library has a number of methods that allow for good and robust object analysis. One such method uses the concept of contours and polygon approximation. Without going too much into the theory of it, we will see the implementation of that here.
There is a function called cvFindContours, which when provided with a binary image containing the object, a data structure to store points, and the other appropriate parameters, returns a sequence of contours in the image. Please refer to the documentation of OpenCV to find out how to utilize this function. Once we have obtained the sequence, we can run the function called cvApproxPoly, which takes all the contours and returns the ones which are linked to each other and the corresponding approximate polygon formed by them. Hereafter, we can analyse the successive linked contours.
We can count the number of vertices obtained and compare them with what we know will be the result for the various signs. This can take care of distinguishing between the various polygons.

Fig: A sample of how the above method works Shape Detection
This method can also prove very useful, either stand-alone or after combining with contour matching. This method also utilizes a variation of the Hough transform to detect what the shape is. The reader is encouraged to go through the algorithm in detail. An excellent treatment of the problem can be found here.
The basic principle is reducing the image of the shape to simply the outer edge, by using a combination of colour detection, edge detection and blob labelling. Thus, we can obtain the approximate centroid of the figure. After that we can plot the distance of pixels versus the angle taken. If there are roughly four maxima, that indicates a rectangular figure; three maxima indicate a triangular figure and the absence of maxima indicates a circle.
Another method is to plot the distance of edge pixels from the centre versus the frequency of that distance – the presence of a single spike would indicate a circle. This method would be effective for only a circle however.
The sample code provided here is used for detecting circles using the above algorithm. MAP PROCESSING
As mentioned in the problem statement, the map provided to you at the start will be a generated image which is a representation of an overhead view of the arena. The image will be a created image instead of a real one, as maps normally are. Have a look at an example map here:

Fig: The yellow and brown patches represent start and end zones
As you may have guessed, the modules of the previous parts do not mean much for Geo-Aware by themselves, until they are tied in with the map processing. For instance, your robot might be able to traverse the corridors well, but when it comes across a symbol at the end of the corridor; it will not be able to understand the significance of the symbol until it can correlate it with the map. Even if it can take the L-turn properly using simply lane following, when it comes across a T-junction, in the absence of a map it would have to make a guess about which turn to take, which could very well lead to a dead end and a penalty.
The method we will describe can work decently well for Rounds 1 and 2, and the concept of it can be extended for Round 3, although we won’t discuss that as such. Furthermore, whatever we discuss here is merely meant to be a platform, a base upon which you can build your own ideas or concepts and solve it in your own way.
Waypoints
These are important locations around the arena that a robot will reach. When connected in a proper sequence, they trace the path of the robot in order. For this particular purpose, we will consider waypoints such that the robot travels in straight lines between successive waypoints, and each waypoint requires it to perform some specific action (turn, start or stop) before moving on to the next one.
Some obvious candidates for waypoints are the locations of the symbols. They appear just in front of turns in the arena, and they represent portions of the arena that are accessible. The start and ending zone patches will also be waypoints, albeit special ones. However that is not all. If you look at the previous figure of the map, the red circle and green triangle are not directly connected (same for the blue circle and blue triangle). To do so, we will need to define another kind of waypoint – the location in front of the T-junction.
Therefore our task now becomes to observe the map from above, determine specific waypoints and put them in correct sequence from the start zone to end zone. If we can do this, then we can trace the path of the robot across the arena and use that to correlate what the robot sees onboard with the overhead map.
Obtaining Waypoints
Before we look into how we can do this, we will need two reduced images that will help us in this purpose. I have illustrated them below and I leave the task of obtaining them to you.

Fig: This represents the total accessible area of the arena, without focussing on symbols. We will call this the ‘Path Image’

Fig: This represents all the landmarks in the arena, including start and end patches. They will be needed to get waypoints. We’ll call this the ‘Landmarks Image’ Once again, at this juncture, I’ll assume you have read our detailed computer vision tutorials so that you understand the terms and processes that I will mention below. The general algorithm is simple and can be applied to any such map:
Obtain the ‘Path Image’ and ‘Landmarks Image’ for the given map (you can of course assume the colours are standard BGR combinations)
Perform blob detection on ‘Landmarks Image’ to get a set of blobs, their colours, centroid etc.
Perform shape detection on each of the blobs (except start and end patches) to get their shapes. Now you can uniquely identify each symbol.
Identify which blobs are directly reachable from each other. By that I mean that the line segment joining the centres of the two blobs, when taken in ‘Path Image’ should pass through white (accessible) areas only. (You can use Bresenham’s line tracing algorithm or just use LineIterator in OpenCV to iterate over the line joining two points in an image)
Try and link blobs in sequence. Begin from the start point, find out which blob is connected to it (there will be only one), and link it to the path, then find out which not-yet-linked blob is connected to this, and so on. You will come across a barrier when you consider a blob before a T-junction (the red circle in this case).
The last main challenge is getting way-points for a T-junction. As you may have noticed, there will be no symbols for T-junctions. One way to get around that is by understanding that the T-junction waypoint will be directly reachable from the end of the sequence you currently have, and one of the yet unlinked blobs. With that concept, you can drop rays from the current end and the various other blobs and find out which of them intersect to form a waypoint. (The implementation is actually very simple; we leave that to you to figure out from the image below)

Fig: A way to generate T-junction waypoints (others are shown too)
And that is essentially it! Once you have all the waypoints in a proper sequence, you can easily find out what turns need to be made where (by comparing the nature of the co-ordinates of successive waypoints). For example, you could have a sequence like this:
Straight from Start -> Right at Red Circle -> Right at T-Junction -> Left at Green Triangle -> Left at Blue Circle -> Right at T-junction -> Right at Blue Triangle -> Straight to Finish
An example of that is given below:

Fig: Obtained after processing this map – the numbers represent the co-ordinates of each waypoint in the image (taking upper left corner as origin) and the directions are self-evident. This captures everything we have discussed above COMBINING THE MODULES
Now that you have made your individual modules, the last challenge is to put all of them together. We leave that as a problem to you, since that is the true essence of this problem statement. You may have your lane following and symbol recognition modules, but the task of knowing which to use when is still dependent on your vision and creativity. Your usage of the map and the sequence of waypoints you have to make decisions about turns will determine how your robot moves.
Your robot will start out following the lane but will soon come up against a sign – the transition needs to be managed carefully. You may use sensors to check for its distance from the wall but an innovative solution with image processing would be really desirable. Again, when it turns, you need to place good checks to know when it has to start looking out for the lane once again.
Furthermore, once you detect the symbol on the wall in front of you, you will have to correlate it with the blobs from the map to locate your position in the map. You can choose not to do this and just use the sequence of turns that you identified, every time you reach the end of a corridor, but that will make your program less robust and more prone to failure, especially if it accidentally hits the wall or changes state.
Once you have made your robot and your program, try testing it on makeshift arenas with your own maps. Even if that cannot happen, do not worry, we will give you ample time to practice here. Just get started and stay motivated and let us know if we can help! Happy robot-making! APPENDIX – HARDER ASPECTS
There are some more difficult aspects to the event that some of you may feel particularly challenged by. Since they are not essential to solving the problem statement as such, but rather for obtaining bonus points and boosting your score, we won’t be elaborating upon them in detail but rather providing some ideas you can try out.
TUNNELS
Rounds 2 and 3 will have tunnels in the arena. They will be shortcuts through inaccessible areas that will not be visible from above but will exist in the arena, and, if taken correctly, can greatly reduce the time you spend in the run. Look at the two images Round 2 tab of our event here to spot the tunnel and understand how it will appear.
This is where the idea at the end of the previous section becomes important. If you map out your path before the run and simply have your robot follow it without any real-time correlation, it will miss the tunnel entirely as it will have no reason to consider its existence.
However, if you keep checking for symbols at every junction, and correlating them with your map, you stand a better chance at spotting a tunnel. How exactly you’ll do this is up to you, but understand this general idea that when you expect to see the end of a corridor or a wall or something, and instead you see a path there, chances are you’ve come across a tunnel. VARIABLE START POINTS
As you may have read, a major difference between Round 3 and its predecessors is the presence of multiple start points. There is also the issue of multiple target zones (red octagons which can be visited en route to the exit for more points) but that is just an extension of the ideas of Round 1 and 2 and if you’ve understood those, you can easily implement that here.
The variable start points can pose a bigger problem. Remember that there will still be one end zone, but you do not know where you might start. When you get the map, there will be no start zone as such to process. You could perhaps assume a number of start points for various possible locations, and map the paths to the various targets and the end zone from each of these hypothetical start points. Then, once you begin, go forward, reach your first landmark, compare it with your map and find out which of those hypothetical paths you are on, and then traverse that for the rest of the run (also looking for tunnels as you do).
Another possibility is to do nothing with the map before the run – let the robot start and reach its first landmark. Once it has done so, then try and localize the robot in the map and move ahead accordingly. There are a number of other ways you could handle this – we’ll leave that to you.
You can discuss your doubts regarding this event at our Geo Aware Forum
Tutorials for Image Processing can be found here (using OpenCV & MATLAB).